6.1 Tracks and Regions
Tracks:
ADD supports up to 40 tracks. Each track comes with their track number, a meter, a pan knob, solo and mute buttons and a lock button which enables you to lock all regions in place. You are able to drag tracks to change their order. The track numbers will automatically adjust depending on their position in the timeline.
To select multiple consecutive track, click on the first track + Shift+ Click on the last track.
To select multiple non consecutive tracks, press Command + Click on the desired tracks. To unselect one, press command + Click on the track.
In order to delete a track, click on the head track and hit “Delete” from the keyboard or press Command + X.
How To Create A New Track:
- Choose TIMELINE > ADD TRACK or Press Command + N

Every new track created will be named “Audio 1 (or whichever track number it is).” You can easily rename tracks by double clicking on them.
Every time you drag an audio file from the library window into the Timeline. A color will be automatically assigned to the tracks that corresponds to the category of the audio file.
Every time you place a new sound using a trigger the track color assigned will match the category of the sound triggered. The track will use the name of the audio file as a track name.

To avoid creating a new track when triggering a sound, place the cursor where you want the region to start and the click on the desired track. Then you can press “T” for transition and the region will be placed in the track selected.
Ruler track: The ruler track is placed at the top of all the audio tracks. It contains the markers and the time indicators. In the head of the track you will find global commands that allows you to solo, mute or lock all tracks. You can also expand the ruler by dragging the black triangle to the right.

Video Track: The video track displays frames of the video and its waveform. It allows you to solo, mute, pan and lock the video and comes with a meter to control the volume level. The video track cannot be renamed.
Regions:
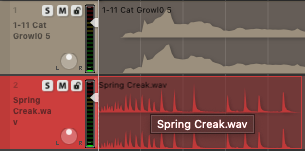
Every region displays the waveform, the name of the sound at the top left corner and most of them come with a dotted line aligned to the sync marker. When a region is selected the color becomes darker. When it’s unselected it become brighter. To select multiple regions, drag the pointer to the left.
When you solo a region, it will be outlined in yellow.

When a region is muted, it will be outlined in blue.

To trim a region:
- Position your pointer to the left or right boundary.
- The pointer will turn into a right arrow.
- Drag the arrow to a desired position.

When two regions are overlapped, both regions will sound at the same time. One region will not overwrite the other.
6.2 Elements Vs. Stems:
In A.D.D you will find two types of audio clips: Elements and Stems.
Stems are audio files that contains musical, they usually are larger than elements. In this stem, you can see 3 different elements divided by dotted lines. By using Command + D you will be able to separate them in individual audio clips.

A very easy way to work with stems it’s by using the Presets from the Library window.
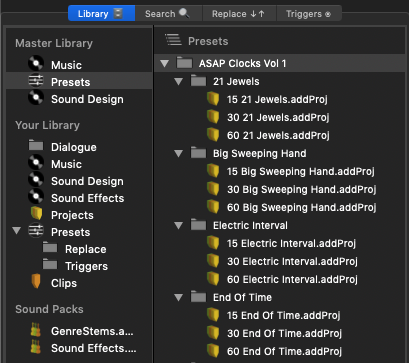
When dragging one of the presets to the timeline, each stem will be assigned to a new track in order to be played as a single composition.

6.3 The Sync Marker:
ADD sounds have metadata that contain a Sync Marker, which is placed on the highest transient of each region and is the point in which the region will sync to your video when triggered. Therefore, when you trigger a sound, it will be placed perfectly in sync.


